

Linen Bread Bag
with optional quilt block

The idea for this project came from my friend Jessica who I learned the art of sourdough baking. Along with the gift of baking Jessica also gifted me a beautiful linen bread bag that captivated me with its simplicity, functionality, and charm. I loved it so much that I was inspired to start making bread bags myself. What began as a one-off soon turned into my go-to gift for friends and family. For bread recipes and more quilt inspiration check out https://www.sugarhouseworkshop.com/
Recently, I had the opportunity to make a batch of bread bags for Teacher Appreciation Week. It felt like the perfect gift—something that embodies creativity, time, and a labor of love, much like the art of teaching itself. These bread bags are not just practical; they carry a personal touch and a sense of care that reflects the dedication teachers show every day.
In the following steps, I will guide you through making your own linen bread bag with a button and loop closure. This project is a wonderful way to create a thoughtful and unique gift, or simply to add a touch of handmade beauty to your own kitchen.
Let's get started!
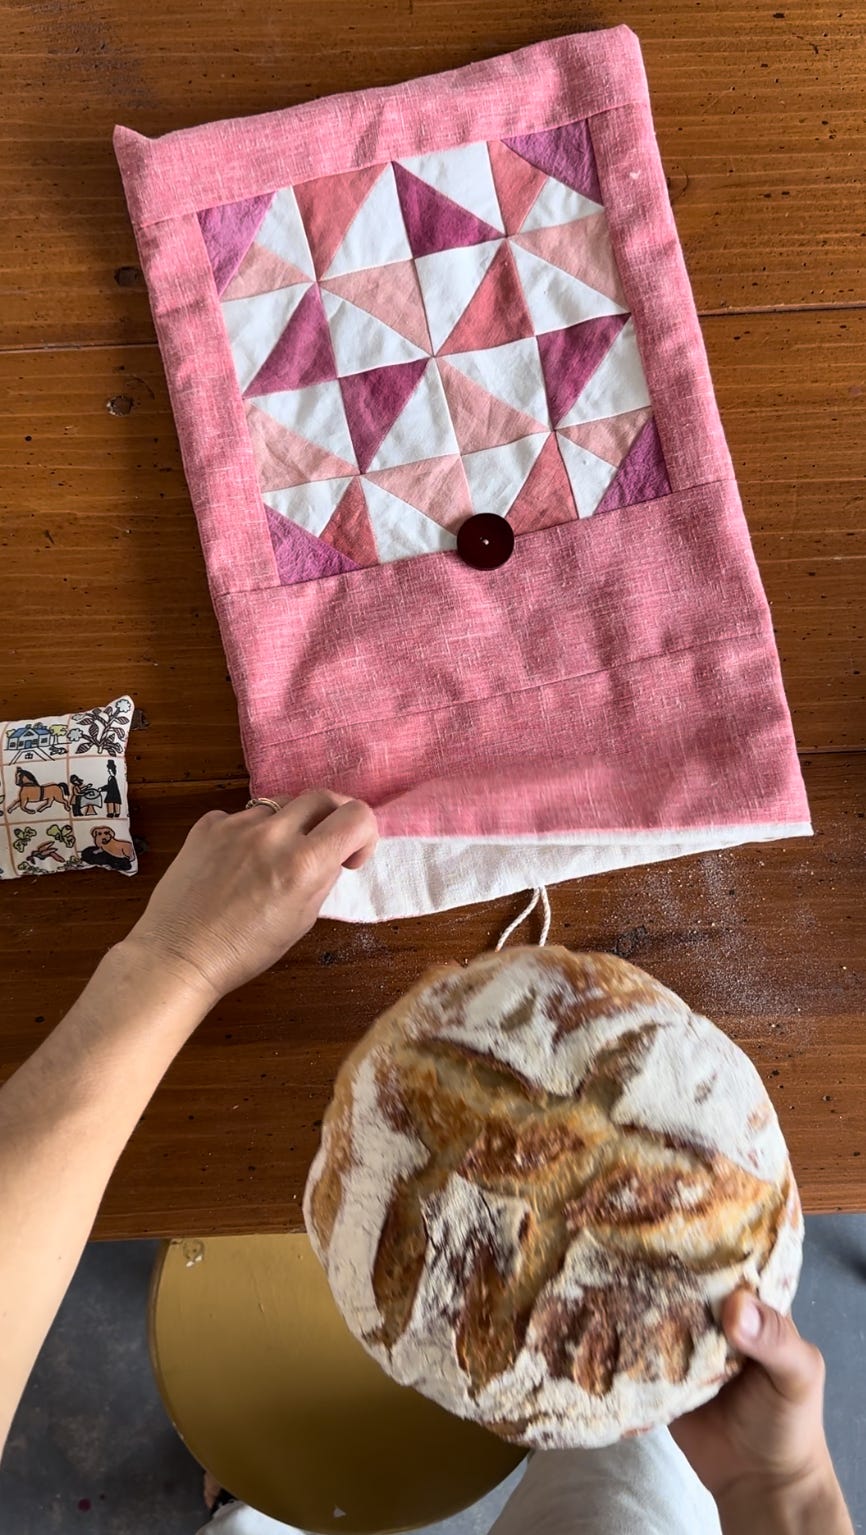
Linen Bread Bag with Button and Loop Closure
Materials Needed:
Decorative outer fabric: 15 inches by 40 inches
Lining fabric: 14.75 inches by 40 inches
Sewing machine or needle and thread
Scissors
Pins
Measuring tape or ruler
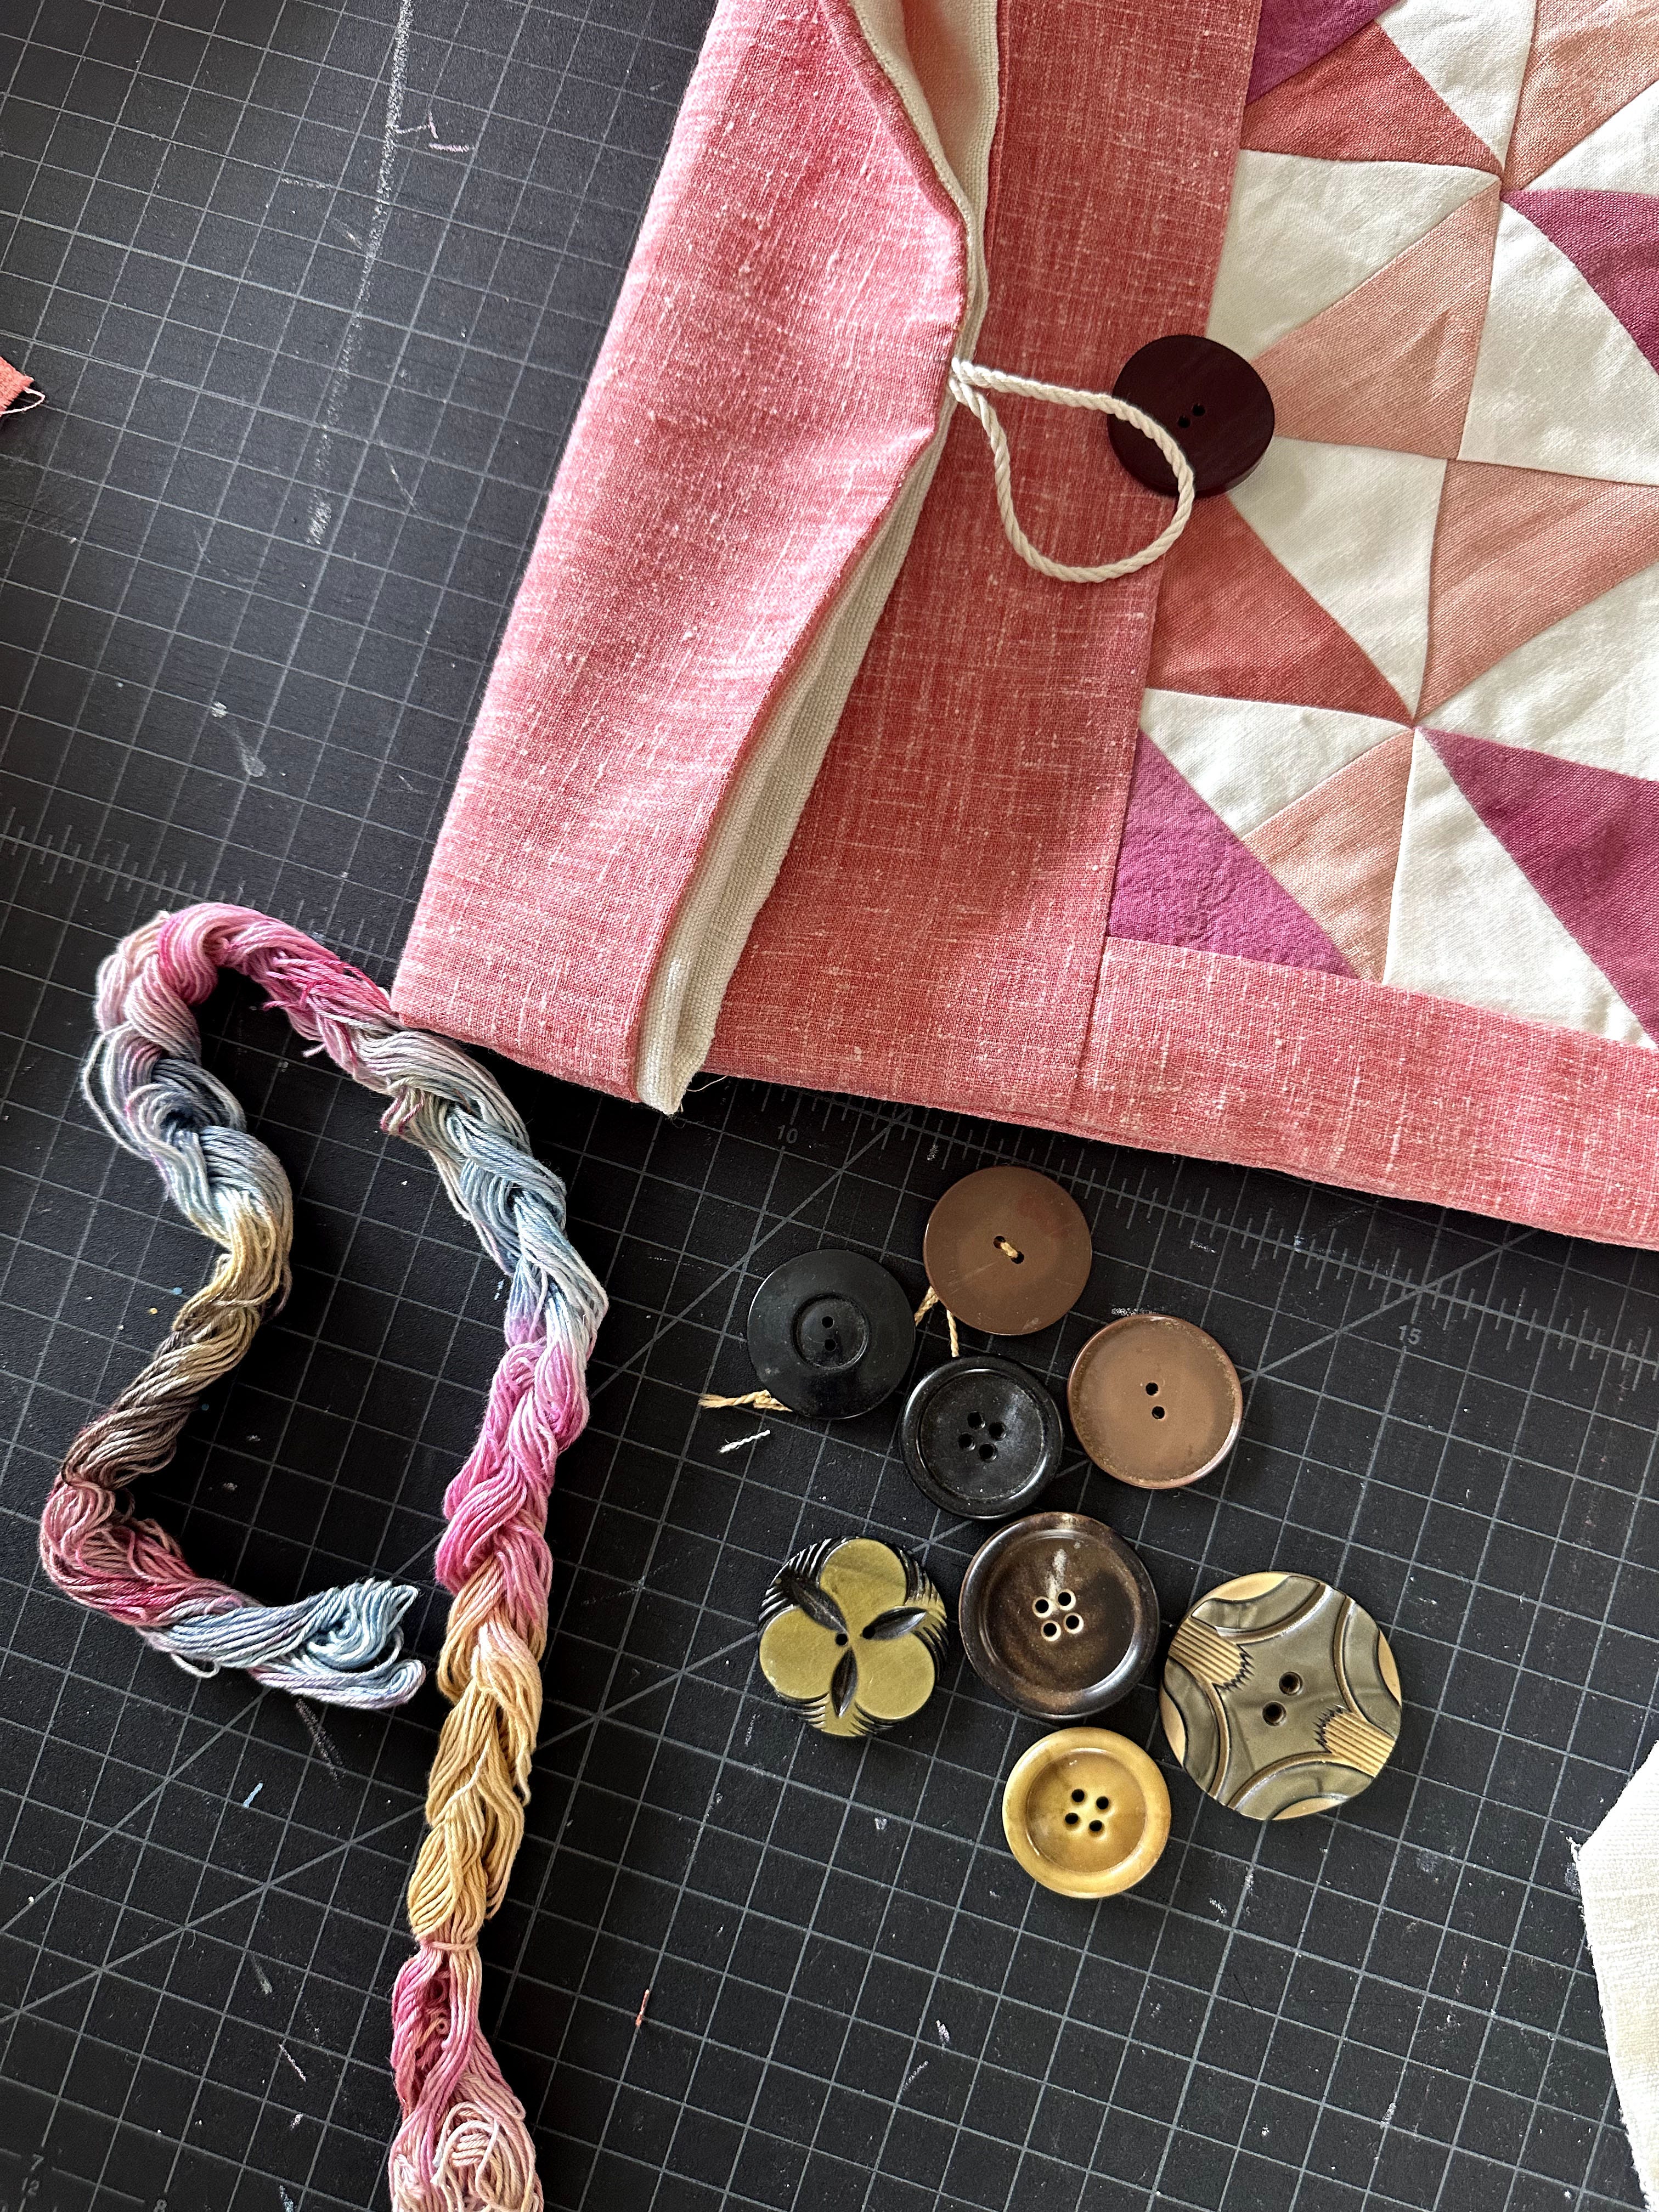
Button (large enough for secure closure)
String or cord for the loop (about 5-7 inches long)
Steps:
Prepare the Fabrics:
Cut the outer fabric to 15 inches by 40 inches.
Cut the lining fabric to 14.75 inches by 40 inches.
To incorporate the quilt block design into the outer fabric, adjust the dimensions to 15 inches by 40 inches. Position the pretty quilt block design in the middle of the fabric.
Prepare the Loop:
Cut a piece of string or cord to about 5-7 inches long.
Fold the string into a loop and set it aside for now.
Sew the Outer Fabric and Lining Separately:
Fold the outer fabric in half with right sides together, aligning the edges. Do the same with the lining fabric.
Pin along the sides of both the outer fabric and the lining, leaving the top edge open.
Sew along the pinned sides of both the outer fabric and the lining with a 1/4-inch seam allowance.
Attach the Loop and Sew the Top Opening:
Turn the lining fabric right side out and keep the outer fabric inside out.
Insert the lining (right side out) into the outer fabric (inside out), aligning the top edges and side seams.
Pin the top edges together, ensuring the loop is positioned in the center.
Sew around the top edge, attaching the outer fabric to the lining and securing the loop in place. Leave a 4-inch opening for turning.
Turn the Bag Right Side Out:
Reach inside the bag and pull the outer fabric and lining through the opening, turning the entire bag right side out.
Push out the corners for a neat finish.
Press the seams with an iron.
Finish the Bag:
Hand-stitch or machine-sew the opening closed.
Press the top edge of the bag with an iron for a neat finish.
Sew the button onto the outer fabric, positioned to align with the loop.
Place bread inside the bag, fold the top edge over, and secure the loop around the button.
Place the bread inside the bag, fold the top edge over, and secure the loop around the button to keep the bread fresh.
Linen is breathable, helping maintain the right level of moisture for bread storage and preventing it from becoming too dry or moldy.
Wash the bag regularly to maintain hygiene. Linen becomes softer and more absorbent with each wash.
Bellow is an illustrated guide to help you step by step
For the purposes of writing and documenting the tutorial I made a new bread bag. The ones that sparked this idea were gifted to our teachers and since I rarely make the same thing twice here’s another linen bread bag, same steps, same dimensions new colors and quilty bits.


